How to Extract Data from PDFs in Power Automate
Learn how to extract structured data from PDFs in Power Automate using AI and validate uncertain predictions with human review.
This guide shows how to extract structured data from PDFs in Power Automate using Cradl AI. You’ll send PDF attachments to an AI model, return the extracted data as JSON, and use the results in later flow steps, such as writing to Excel, Dataverse, SQL, SharePoint, or another system.
We’ll also add human review for uncertain predictions, so low-confidence values can be checked before they continue through your workflow. This is useful for invoices, bank statements, purchase orders, order confirmations, bills of lading, receipts, contracts, and other business documents with varying layouts.
Before we start
You'll need:
A Microsoft account with a Power Automate license
A Cradl AI account
Step 1: Set up your AI agent
In Cradl AI, choose Custom in the onboarding dialog. This simply gives you a starting point with a set of pre-defined fields based on a sample document you upload. In this example, I'll use an invoice. You can easily customize the fields to fit your exact requirements at any time. For now, we’ll stick with the auto-generated ones to keep things simple.
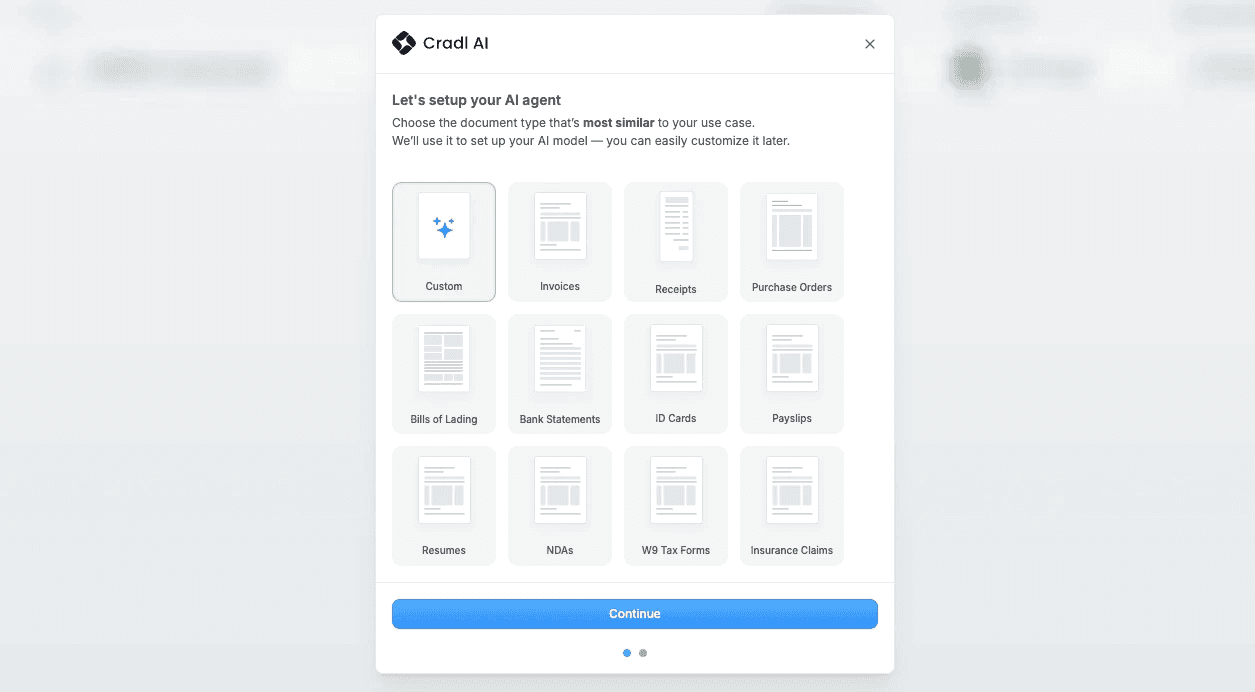
Configuring your AI agent.
Next, go to the Workflow tab and add both a Power Automate trigger and a Power Automate export. When you’re done, your workflow should look something like this:
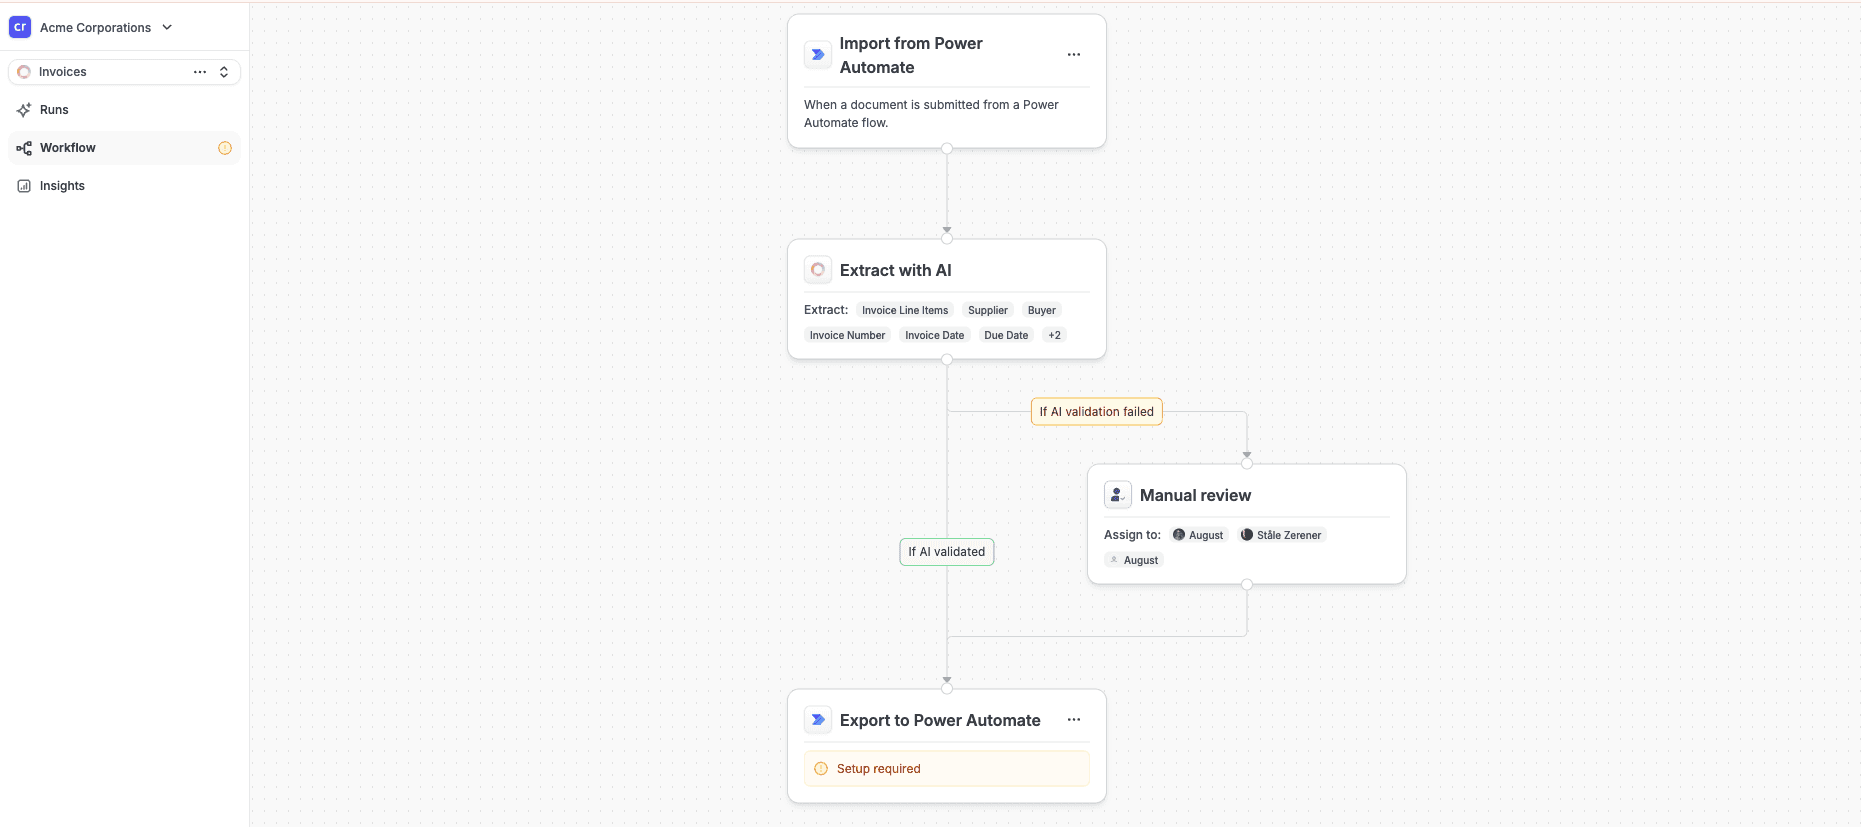
Screenshot of Cradl AI workflow.
Step 2: Create a Connection
Next, head over to Power Automate and either open an existing flow or create a new one.
In this example, we’ll assume our PDFs are fetched from a OneDrive folder and that we want to write the extracted data to a Dataverse table. To connect Cradl AI to your Power Automate flow, add a new action and search for “Extract data from document.” Select it, then create a new connection to your Cradl AI account:

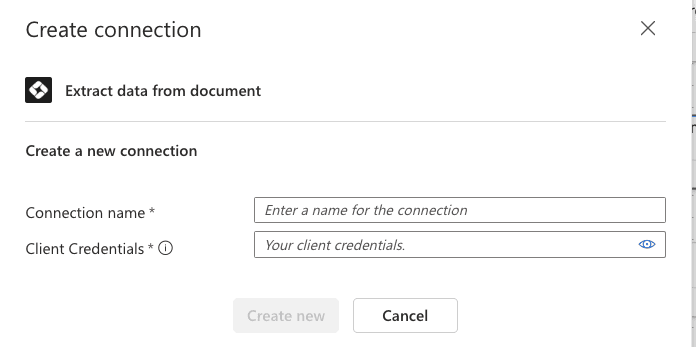
Copying Client Credentials from Cradl AI to Power Automate.
In Cradl AI, go to Workflows, click Export to Power Automate, and copy the Client Credentials. Then paste those credentials into the Client Credentials field in Power Automate.
Next, configure the Extract data from document action. Select your newly created Custom agent from the dropdown. For the Document field, choose the Content Bytes variable from the Download the email attachment step.

Configuring the Power Automate action.
Step 3: Build the Power Automate flow
Now let’s put everything together by building a Power Automate flow that:
Retrieves PDFs from a OneDrive folder
Sends the PDF to Cradl AI for processing
Writes the extracted data to a Dataverse table
When we’re done, your flow will look like the diagram below. If you’d rather skip ahead, you can download the complete Power Automate solution here and start using it right away.

The Power Automate workflow.
Here’s how to configure each action:
When a file is created: In the trigger, select the folder you want to monitor.
Extract Data from Document: Select the agent you created earlier and map the file from the previous step as the document input. For the Document input, select the Body variable from the previous step.
Add a new row: Finally, append the extracted data as a new row to your Dataverse table by mapping the extracted fields to the right columns.
Step 4: Take it for a spin!
Now you’re ready to test the flow. Because we set it up to process documents received by email, send a sample document to the email address you configured and make sure everything runs as expected:

Human-in-the-loop.
Since this is the first document being processed, the AI will be conservative about what it approves automatically. In this case, you might be asked to confirm that the invoice date was interpreted correctly. After you’ve validated a few documents, the AI will become more confident over time. You can also adjust the automation thresholds manually if you want more, or less, automatic approval.
Wrapping up
That’s it, that’s all you need to build a basic document processing pipeline in Power Automate using Cradl AI.
The next step is to add more advanced processing and validation logic. For example, you can match master data from a SQL database or even a SharePoint list. This helps you build a more robust and reliable process, with fewer manual checks and fewer surprises downstream.
FAQ
Can Power Automate extract data from PDFs?
Yes, but usually through a connector or AI service rather than a single built-in cloud-flow action. The best option depends on your accuracy requirements, how often the document layout changes, and whether you need confidence scores, validation rules, or human review before the data is used.
Why is human-in-the-loop important for PDF data extraction?
Because AI models can make mistakes. If your process is simple and low-risk, you may be able to automate it without manual review. But for business-critical documents such as invoices, purchase orders, claims, contracts, or shipping documents, human review helps catch low-confidence or incorrect values before they are sent to downstream systems.
What is the difference between AI Builder and a document extraction platform?
AI Builder can extract data from documents, but extraction is only one part of a production workflow. You may still need to build validation, confidence handling, review queues, exception handling, monitoring, and data mapping yourself. A document extraction platform includes more of this out of the box, reducing the custom work needed to run PDF extraction reliably at scale.
Can this handle different PDF layouts?
Yes. Cradl AI can extract data from PDFs with different layouts, formats, and wording.
What about scanned PDFs or images?
Cradl AI can process scanned PDFs and images using OCR and AI. As long as the text is readable, it can extract structured data from scans, photos, and image-based PDFs.